Gilded & Naturally-dyed Easter Eggs

Nest-2

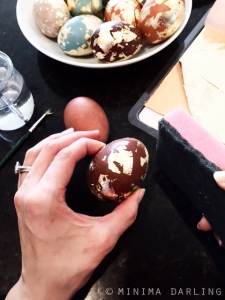
Growing up, I had so much fun dipping perfectly white eggs into their colored baths and watch them instantly emerge in vibrant hues. Now that I’m a mom and try my best to keep artificial colorings and such out of the house, I wanted to experiment with coloring our eggs with none other than….REAL FOODS! Beets, onions, turmeric – all things that I wouldn’t mind if they seeped through the pores of the eggshell a bit…maybe it’ll even count as a serving of veggies ;). Even the glue used to adhere the gold-leaf was made with rice.

Triple

So an idea I’ve had for a while was to take these naturally-dyed (and even more edible!) eggs and use gold-leaf to bring it to another level of pretty.  The concept had been floating around in my head for a couple years, but it wasn’t until this year that I was able to try it out. It took a bit of organization and preparation, and some turned out different form my expectations, but I was so happy with the results! I love that you don’t have to be perfect with the dying or the gilding, it’s a very forgiving design that I was able to do with my 3-year old wanting to “help” with every step.

What you’ll need:

-a dozen eggs (white results in more vivid colors than brown)

-dye materials as described below

-a couple teaspoons of rice flour or cooked white rice

-a couple Tablespoons of water

-small paintbrush

-4-5 sheets of gold leaf

-sponge, the kind with a scratchy side works well

IMG_1321

Steps:

First I made the dyes, using this guide and made about 4 cups of dye per color (2-3 eggs at a time).

-Blue: red cabbage

-Green: red cabbage plus a 1/4 tsp of turmeric powder

-Rich orange: yellow onion skins

-Beige-y: beets (was supposed to be pink…tried twice…maybe bad beets?)

-Deep Rust: red onion skins (on brown eggs)

Next, I made some “perfectly” hard-boiled eggs – mostly white ones, but I threw in a couple brown eggs as well just to compare. They soaked in the fridge overnight….this step is more an art than a science, just rotate when you can to prevent white spots and take them out when you like the color!

IMG_1335

The next day was for drying and gilding. As the eggs dried on a plate in the fridge, I noticed the colors changed a bit. The blue tone warmed up a bit and the pink (beet) eggs turned more beige. Use bit of parchment paper in between to keep eggs separated, if needed.

IMG_1365

Meanwhile I made a little batch of rice glue and carefully tore the gold sheets into randomly sized pieces. Using a light hand, I dabbled the glue all over a dried egg and applied the gold leaf, lighting pressing down the edges. After about halfway dry, I took the sponge and broke up the edges. Dry fully and refrigerate until they are ready to be hidden and eaten! Enjoy 🙂

Nest

Wow. Oils!

OK, so seeing as though my track record is a whopping 2 posts a year, I don’t know if I’ll be breaking any posting streaks, but I’m really excited to share something that’s been a new wonder to me: Essential oils. The therapeutic-grade kind.

IG-Starterkit

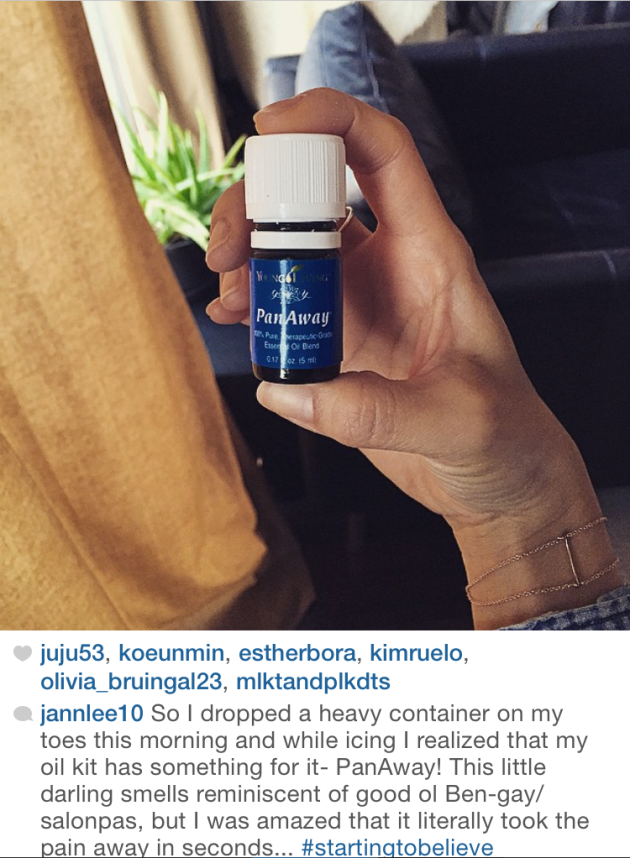
I’m a smells kind of girl… I used to think that being a “Nose” for a fancy parfumerie would be a dream job before I was turned off by the idea of lab-created synthetic fragrances being less than ideal for health. Fast forward to this week, when my friend introduced me to pure natural essential oils. I was intrigued and convinced of the safety/purity enough to purchase a starter kit from Young Living. At the least they will make my home smell lovely, right? At best, they can overhaul and detoxify my medicine cabinet. Initially, I wondered if it was mostly for psychosomatic benefits, but this morning’s incident is starting to turn me into a believer:

IG-PanAway

I’m just starting to get my feet wet with this stuff, so I’ll share more of my experiences as I learn and discover!

xoxo,

Julie

Mommy & Me swimwear

Hi there! Now that it’s mid-summer and we’re spending the days visiting Chicago’s beaches and sprinkler parks, I’m realizing the importance of having multiple swimming suits for both myself and my munchkin. We are also in a phase where my daughter is delighted when she realizes something she is doing or wearing is “just like mommy”. Inspired by the adorable matching Marysia swimsuits that Oh Joy posted about recently, I put together these fun complementary sets for moms and their little girls 🙂

Happy weekend!

-Julie

MommyDaughterSwim


1: Mini Boden

2: (top) AE, (bottoms) Boden

3: J.Crew Baby

4: (top) PitaPataDiva via Etsy, (bottoms ) J.Crew

5: Lilo Tati Swimwear

6: (top) Modcloth, (bottoms) J.Crew

7: Jumping beans 

8: Princesse Tam-Tam

Patriotic (and superfood-filled) Brownie Pudding Cake

20140703_4thOfJulyBrownies_Corner

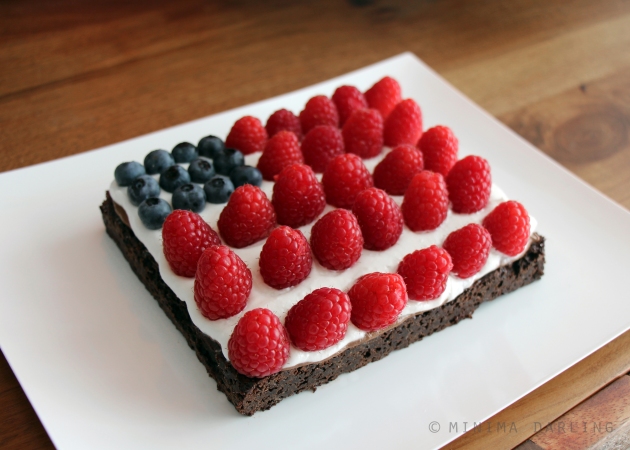
So I’ve been thinking about what to make for our 4th of July bbq tomorrow and remembered a dessert that a friend’s mom had introduced me to many years ago…a decadent layered concoction of brownie, chocolate pudding, whipped cream and berries…something about the pairing of a cake/cookie with a moist component like ice-cream or sauce really does it for me. The boxed brownie mix, cool whip and instant pudding mix that mom used aren’t the healthiest ingredients, so here is my healthier (and just as rich and delicious) version! Bonus points for it being organic,vegan, gluten-free, dairy-free and full of super foods like chia, blueberries, raspberries, extra virgin coconut oil, dark chocolate. It is almost refined sugar free too, using dates and coconut palm sugar for the base layers and just a tiny bit of powdered evaporated cane juice in the whipped cream.

Continue reading

Our Morning Ritual Smoothie…

Starts out like this:

Smoothie_Green-Ingredients1

Ends up like this:

Smoothie_Green-BirdsEye

For the past year and a half, I’ve been making these green smoothies to start of our day. It’s become such a ritual that even my not-as-health-conscious husband says he feels so much better having them and we miss them terribly when we are traveling. There is a huge abundance of green smoothie recipes out there to suit every taste, so I just thought I’d share mine in case it’s a good match for you.  I would say that this recipe isn’t meant to be a precise prescription, but more of a guideline…an art rather than a science, if you will :).

Our mix varies a bit a bit day-to-day in order to get in more variety. Somedays, it won’t even be green since I use beets and minimize greens to avoid the unappealing muddy brown that would result from that.  Speaking of muddy colors, there is definitely a time and place for frozen mixed berries from the store, but I wasn’t a fan of the gray coloring properties for this particular use. We like our smoothies really cold, and in order to make it as nutrient-dense as possible, I started to freeze chunks of fruit and use frozen spinach and kale instead of ice.   I favor using chunks of frozen mangos and bananas to add a nice base layer of smooth sweetness and some lemon to cut through some blends that taste exceptionally green. In addition to this being my main opportunity to feed kale and broccoli to my family, I also add in nutritional boosts like spirulina, flax, chia, vitamin B12, and Dulse flakes (an iodine-rich sea vegetable that my husband will otherwise not touch). I like to add non-sweet ingredients like avocado, whose healthy fat content in conjunction with all the fiber in the produce help slow down the absorption of  sugar into the bloodstream.

Smoothie_Green-Ingredients3

A note about the blender used to make this smoothie…. this can be made in a regular blender, of course. We have done that when away from our home.  However, I must say that it makes a huge huge difference to use a high-speed blender like a Vitamix or Blendtec because the texture will be so much smoother (make it taste even better!). Since I make this everyday, it’s really worth it for me that my Vitamix cuts down on blending time AND clean-up. I try to save even more time by washing and prepping the produce at the start of the week so that I can just grab and go.  I’m thinking of even making little smoothie “kits” and storing all the produce needed for one batch in individual containers. I’ve even made extra large batches to save some for the next day. They keep just fine, but keep in mind if adding avocados that it may oxidize in the fridge and look a little browner near the top (like guacamole).

Smoothie_Green-Blender1

Smoothie_Green-Blender2

Here is the general recipe I use as a base, but of course feel free to substitute or adjust so that the resulting smoothie keeps you coming back for more!

Daily Green Smoothie (serves 2-3:)

Smoothie_Green-Ingredients2

Ingredients (organic if possible):

  • 2 cups of unsweetened *almond milk (or milk of choice, or even coconut water or plain water)
  • 1/2 lemon (deseeded, sometimes I keep peel on for these benefits)
  • 1 peeled medium carrot or about 6 baby carrot pieces
  • large handful of fresh greens (lettuces, kale, spinach, I’ve even tried a little arugula)
  • about 1/2 cup of cucumber or zucchini
  • sometimes a couple celery stalks
  • 1/2 avocado
  • a few cherry tomatoes
  • 1 pear or apple
  • 1 banana
  • 1 orange, peeled
  • a couple of broccoli florets
  • 1 cup of frozen spinach/kale
  • 1/2 cup frozen mango or melon

the following I mix and match and vary from day to day and adjust according to taste preferences:

  • 1 vitamin B12 tablet (it’s not just vegetarians/vegans who can be lacking this important vitamin)
  • 1-2 teaspoons of fresh ginger
  • 1 heaping tablespoon of flax meal
  • 1 heaping tablespoon of chia seeds
  • 1 teaspoon of dulse flakes
  • 1/2-1 teaspoon of spirulina or chlorella powder (or when I have then in tablet form, 1 or 2)

Directions:

Pour in the liquid base first, then the ingredients that need the most blending (i.e. dulse flakes or tougher veggies).  Try to layer the lightest (greens) to heaviest (frozen fruit) ingredients, so the heavier ones  can push down and get everything to the blades. (My blender comes with a tamper that can be used to push everything down, but I rarely have to use it.) Sometimes I wait a bit to add the frozen fruit later because the friction of the blades will warm up the smoothie a bit, so the dose of cold near the end ensures a frosty drink. Pour into glasses and enjoy!

-Julie

*Note- for some reason, when I’ve tried smoothies with Almond Breeze brand milk (unsweetened vanilla flavor), the smoothie acquired a strange bitter-ish taste.  My hunch is that it’s a certain additive in this brand that reacts with the fruit.  My experience with Trader Joe’s Unsweetened Almond Vanilla milk, Whole Foods Brand Unsweetened milk or homemade almond milk has been delicious 🙂

Cucumber Dill Salad with Avocado, Corn and Quinoa

Cucumber Dill Salad with Avocado, Corn and Quinoa

I finally decided to start a blog! I’m usually pretty terrible at journaling, but I figured that at the least, this can serve as a digital journal for my culinary thoughts and a consolidated place for collecting all the things I fall in love with whilst browsing online. If, along the way, passerby stop in and find my recipes helpful, all the better!

So for lunch today I had a satisfying salad meal that tasted as sunny as the weather happened to be. Freshly-picked dill from my mother’s garden added a nice touch of brightness while the creamy avocado and touches of sweet corn provided a nice base of flavors.  Even my 1.5 year-old liked it (although, next time I may mince the dill more finely for her). A smaller portion can be served over a bed of greens (try a neutral-tasting one like spinach, as arugula or radicchio may compete with the flavors too much) to lighten it. Also, if the tofu can be omitted or substituted with beans or even feta, if you love cheese!

Cucumber Dill Salad with Avocado, Corn and Quinoa

Serves 4 to 6, I use organic ingredients whenever possible

  • 1 cups of cooked quinoa (pre-soaked, here’s why)
  • 2 cups of cubed (1/2″) cucumber (the crispier varieties are recommended such as picklers, persian or even hothouse)
  • 1 cup of sweet corn (I used organic frozen and thawed)
  • 1/2 block of firm tofu cubed (1/2″), (I recommend sprouted, here’s why)
  • 1 ripe avocado, cubed( 1/2″) (my tips for cutting up avocado)
  • 2 Tablespoons of extra-virgin olive oil
  • 2 Tablespoons of apple cider vinegar (I like raw, here’s why)
  • 1 small clove of garlic or 1/4 teaspoon of garlic powder
  • 2 Tablespoons of fresh chopped dill plus a some larger sprigs for garnish
  • Salt and Pepper to taste (I like pink Himalayan salt, here’s why)

In a large bowl, mix quinoa, cucumber, corn, tofu, olive oil, apple cider vinegar, garlic and chopped dill. Gently fold in chopped avocado and season with salt and pepper to taste. Serve with remaining dill garnish on top. That’s it!

Bon appetit!

-Julie